
Working together with your fuel line is greatest left to the professionals. How do you fix a broken natural gas line? +10 Steps, A damaged or leaking fuel line may be disastrous for each you and your loved ones. It will possibly trigger severe well being and security issues. Thankfully, there are indicators that your fuel line must be repaired in order that it doesn’t pose a menace to your house. Let’s check out the indicators of a fuel leak in your house:
- Gasoline Odor
- Uncommon Noises From Home equipment
- Month-to-month Bill Improve
- Hissing Sounds From Gasoline Traces
Gasoline line leaks may be disastrous for you and your loved ones. Due to this fact, rapid motion should be taken to keep away from additional issues. How do you repair a broken gas line to repair fuel line leaks? +10 Steps Accordingly:
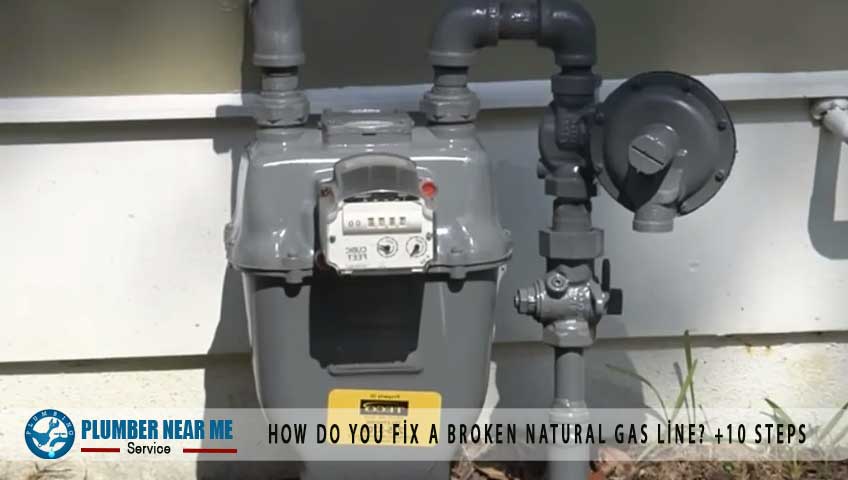
Step 1 – Flip Off the Gasoline
Don’t forget to show off the fuel, as it is extremely harmful to work with fuel.
Step 2 – Take away the Covers
Gasoline traces have outer covers made principally of plastic. Take away them to disclose the fuel pipes beneath. Since respiration such gases is dangerous on your respiratory system, it’s best to all the time put on gloves and a fuel masks.
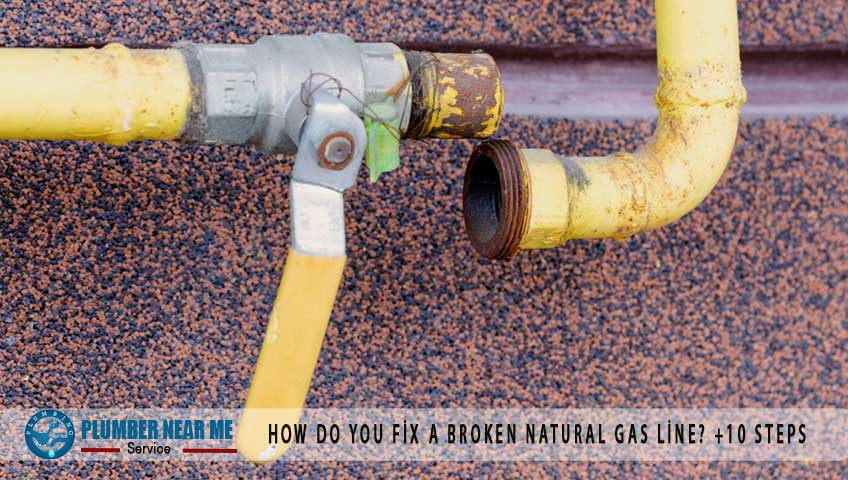
Step 3 – Take away Gasoline Line
How do you fix a broken natural gas line, The excessive strain contained in the pipe causes a fuel line leak. Eradicating the low strain fuel line from the fuel regulator might help you restore the leak.
Step 4 – Take away Residual Gasoline Stress
Take away residual fuel to empty the pipe. You could break the road connections within the excessive strain line to take away the residues. You will have the assistance of a key to carry out this process.
Step 5 – Clear the Line
You will need to take away impurities within the excessive strain line. Use acetone to take away impurities.
Step 6 – Abrade the Floor
Use sandpaper and scrape to easy the floor. Scrub the fuel pipe as effectively after which clear it once more utilizing acetone.
Step 7 – Set up Gasoline Line
When putting in the fuel line, be sure that it’s unfastened as a result of tightening could cause new leak factors. Use a rubber band to seal leaks. Additionally ensure that the angle is appropriate and that the excessive strain fuel line doesn’t overlap the low strain fuel line.
Step 8 – Apply Epoxy
Place the epoxy on the fuel line to remedy and maintain it tight. Then tighten the fittings on the high-pressure fuel line after curing. As soon as every thing is full, it is time to rebuild the low strain fuel line.
Step 9 – Check the Gasoline Traces
It is rather vital to check the fuel line to make sure that the restore is profitable. Due to this fact, activate the fuel and examine for leaks. If there are any leaks, repeat the method of sealing the leaks till you might be positive there are not any extra fuel leaks.
Step 10 – Reinstall the Covers
Lastly, it is time to reattach the covers you eliminated in step one. Should you full all of the steps completely, you may ensure that there will likely be no extra fuel line leaks in your system.

Write a Comment