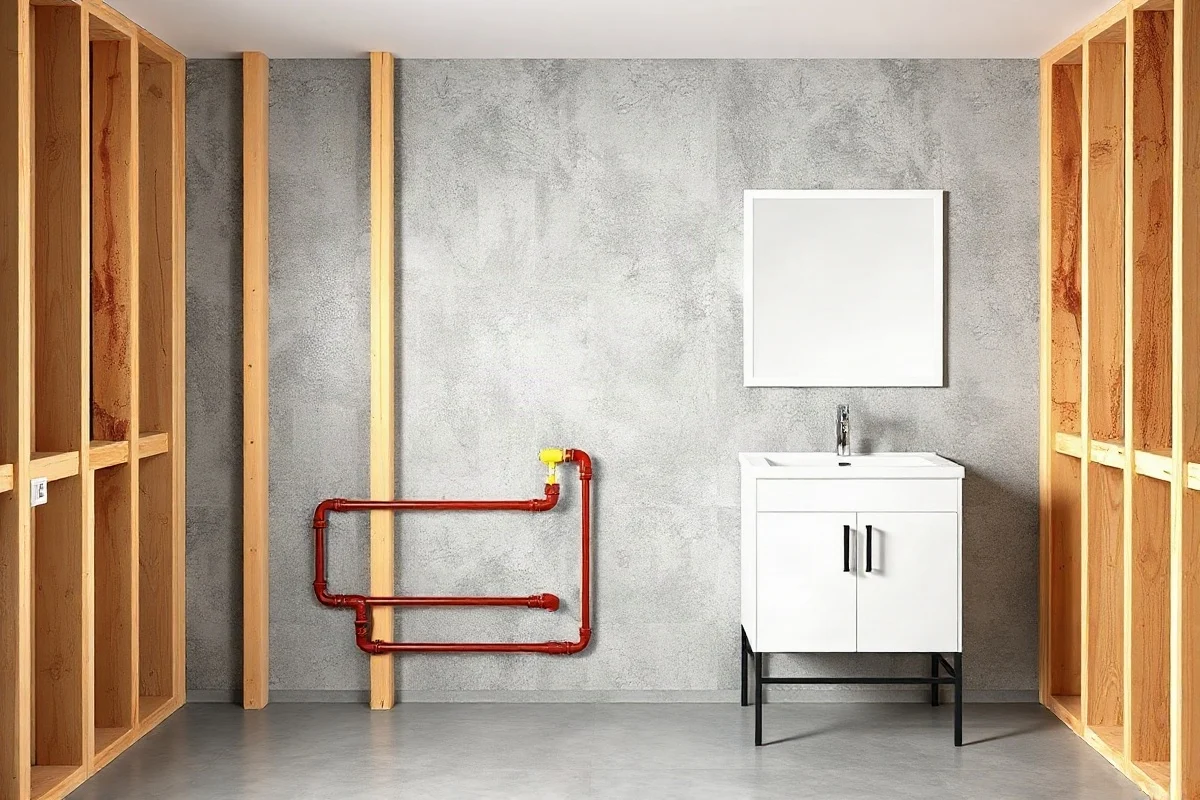
Rough-in plumbing for a bathroom vanity means positioning the water supply lines and drain connection inside the wall before the vanity, sink, and finished wall are installed. The drain must line up with the sink trap, while the hot and cold supplies must reach the faucet without being blocked by the cabinet or drawers. Exact placement depends on the vanity design, sink type, wall construction, and local requirements, so a qualified plumber should confirm the layout before pipes are permanently installed or concealed.
What bathroom vanity rough-in plumbing includes
A vanity rough-in normally includes three main plumbing components: a drain opening, a hot-water supply, and a cold-water supply. The drain connects the sink tailpiece to the building drain through a trap. The supply lines connect the faucet to the home’s hot- and cold-water piping through shutoff valves.
The visible faucet, sink, flexible connectors, trap, and shutoff valves are often installed later. During rough-in work, the plumber focuses on the locations and connections that will be hidden behind the finished wall or inside the cabinet. The goal is to leave enough access for final installation while avoiding conflicts with shelves, drawers, cabinet supports, and the sink basin.
Some vanities use a wall-mounted design, while others sit on the floor. A vessel sink, undermount sink, drop-in sink, and integrated countertop can all place the drain and faucet connections at different heights. This is why a rough-in should be based on the actual vanity and sink specifications rather than on a generic measurement.

Why the layout must be planned before installation
A small error can create a major installation problem. If the drain is too high, it may interfere with the bottom of the sink or prevent the trap from fitting correctly. If the supplies are too far apart, they may not align with the faucet connections. If a pipe enters where a drawer needs to slide, the vanity may require modification or may not fit at all.
Before any cutting or pipe relocation, identify the vanity’s:
- Overall width, depth, and height
- Sink type and basin position
- Faucet hole arrangement and reach
- Drawer, shelf, and cabinet locations
- Back panel openings or plumbing cutouts
- Distance from the finished wall and floor
Also determine whether the drain and supply lines are coming through the wall or floor. Wall plumbing is common for many standard vanities, but floor penetrations may be necessary for some layouts or existing installations. Moving plumbing through a finished floor or wall can involve structural, electrical, or concealed-pipe concerns and is generally professional work.
Typical vanity plumbing components
Drain and trap
The sink drain carries wastewater into the trap, which holds a small amount of water to help block sewer gases from entering the room. The trap must be positioned so it is accessible and properly aligned with the sink drain. It should not be buried permanently inside a wall or sealed inside a cabinet where it cannot be inspected or serviced.

A slow drain, recurring odor, or water beneath the trap may indicate an installation or maintenance problem. Homeowners can usually inspect visible slip-joint connections and place a container beneath the trap before carefully tightening a loose connection. Do not overtighten plastic fittings, and stop if a fitting is cracked, seized, or connected to concealed piping. For more persistent drainage issues, see this guide to clogged drain problems.
Hot- and cold-water supplies
Each supply should terminate at an accessible shutoff valve. These valves allow the faucet to be serviced without shutting off water to the entire home. The valves should be positioned where the vanity doors or drawers do not obstruct them and where flexible faucet connectors can be installed without sharp bends or strain.
Supply lines should not be stretched tightly, kinked, or forced into an awkward position. If a valve drips, a connector is corroded, or a supply line shows bulging or damage, shut off the water if safe to do so and arrange for qualified repair. A concealed leak behind the wall should not be opened casually because water may have affected drywall, framing, insulation, or electrical components.
Common rough-in problems and what they mean
The sink drain does not line up
This often happens when the vanity or sink is different from the original design. It can also result from measuring to the unfinished wall instead of the finished wall. A small offset may be manageable with an appropriate drain arrangement, but forced connections can leak or place stress on the trap. A plumber should assess the layout before cutting the cabinet or moving a drain.
The drawer hits the plumbing
Drawers need clear space behind them. A drain or supply line installed in the drawer path may require a cabinet modification, a different vanity, or plumbing relocation. Cutting a cabinet without checking its structural supports can weaken it and may not solve the problem.
The vanity rocks or sits away from the wall
An uneven floor, baseboard, wall irregularity, or incorrect cabinet dimensions can create a gap. Do not use plumbing connections to pull a vanity tightly against the wall. Secure and level the cabinet first, then make sure the drain and supplies remain aligned without strain.
The faucet has weak flow
Low flow may come from a partially closed shutoff valve, a blocked faucet aerator, a kinked connector, or a broader supply problem. A homeowner can confirm that both shutoff valves are open and clean an accessible aerator according to the faucet manufacturer’s instructions. If flow is weak at several fixtures, the cause may be farther upstream and should be evaluated by a qualified professional.
Water appears under the vanity
Place a dry paper towel beneath the trap and supply connections, then run the faucet briefly while observing from a safe position. This can help identify a visible drip. Keep water away from electrical devices and do not reach into standing water if an outlet, cord, or powered device may be involved. If the leak is inside the wall, continues after the water is shut off, or is causing significant damage, contact a qualified local plumber promptly. Information about related repairs is available through leak repair services.
Safe homeowner checks versus professional work
Low-risk checks include measuring the vanity and sink, reviewing the manufacturer’s installation instructions, locating the main water shutoff, checking for visible drips, confirming that accessible faucet valves are open, and looking for cabinet or drawer interference. Take photographs before removing any visible parts, and keep a bucket and towels available when inspecting a trap.
Professional help is appropriate when pipes must be moved, a wall or floor must be opened, a drain is leaking inside a concealed space, water damage is present, or the existing plumbing does not match the new vanity. Work involving sewage exposure, major flooding, electrical hazards, structural changes, or code-sensitive installations should be handled by a qualified local professional. Do not use open flames or heat near unknown piping, and do not cut into a wall until hidden electrical and plumbing routes have been considered.
Repair, replacement, or complete repiping?
Repair may be reasonable when the existing drain and supply locations are sound but a valve, connector, trap, gasket, or faucet has failed. Replacement is often practical when components are corroded, damaged, difficult to operate, or incompatible with the new sink. If old piping is severely deteriorated or the layout repeatedly causes leaks, a plumber may recommend replacing a larger section rather than making another short-term repair.
The correct choice depends on the condition of the pipe, accessibility, leak location, material compatibility, water damage, and the design of the replacement vanity. Ask the plumber to explain whether the proposed work addresses the underlying cause or only the visible symptom. If you are comparing a new sink with repairs to an existing setup, this sink installation resource can help you prepare questions.
Cost factors for vanity rough-in plumbing
There is no reliable single price for this work because each bathroom has different access and conditions. Important cost factors include whether the wall is open or finished, the distance to existing supply and drain lines, pipe material, the vanity and sink configuration, the need to move a drain, the condition of shutoff valves, water damage, and the amount of finish work required afterward.
Labor may also increase when the plumber must work in a cramped cabinet, remove flooring or drywall, protect finished surfaces, or coordinate with a carpenter or countertop installer. Local rates and requirements vary, so request a written description of the planned work rather than relying on a generic online estimate. For broader planning information, review the site’s guide to plumbing cost factors.
How to choose the right plumber
Look for a local professional with experience in bathroom remodeling, concealed piping, drain alignment, and vanity or sink installation. Before work begins, provide the vanity specifications, sink instructions, faucet model, photographs of the existing plumbing, and the intended installation date.
Ask what the plumber will inspect, which parts will be opened or removed, how the drain and supplies will be tested, and whether the proposal includes only plumbing or also wall, flooring, cabinet, and countertop work. Confirm the professional’s qualifications and insurance directly, and check applicable local requirements with the relevant authority instead of assuming that rules are identical everywhere. A useful starting point is this guide to hiring a plumber.
Preparing for final installation
Keep the vanity, sink, faucet, drain assembly, and installation instructions on site before the rough-in is finalized. Verify the finished wall and floor surfaces, because changing wall thickness or flooring height can affect alignment. After installation, run both hot and cold water, inspect every connection, fill and drain the basin, and check beneath the vanity for slow leaks.
Open cabinet doors and drawers fully to confirm that nothing contacts the plumbing. Leave shutoff valves and the trap accessible for future maintenance. A carefully planned rough-in makes the vanity easier to install, service, and replace while reducing the chance that a hidden leak or poor alignment will create a larger bathroom repair later.



Comments
0No comments yet. Be the first to share a helpful note or question.
Leave a Comment
Your email address will not be published. Comments are reviewed before appearing on the site.